무더운 어느날 신입 개발자의 고민
무더운 어느날, 도형나라
도형나라 개발자 ‘세모’는 4살때 ‘엄마 아빠’보다 ‘hello world’를 먼저 외친 천재 개발자이다.
‘세모’는 자라서 도형나라에서 핵심 개발자가 되어 일필휘지로 코드를 암산하듯 써내려가는 개발자로 이름을 날렸다.
‘세모’의 유일한 일은 ‘도형복지부’ 소속으로 도형나라 국민들의 면적을 계산하는 로직을 개발하는 것이다.
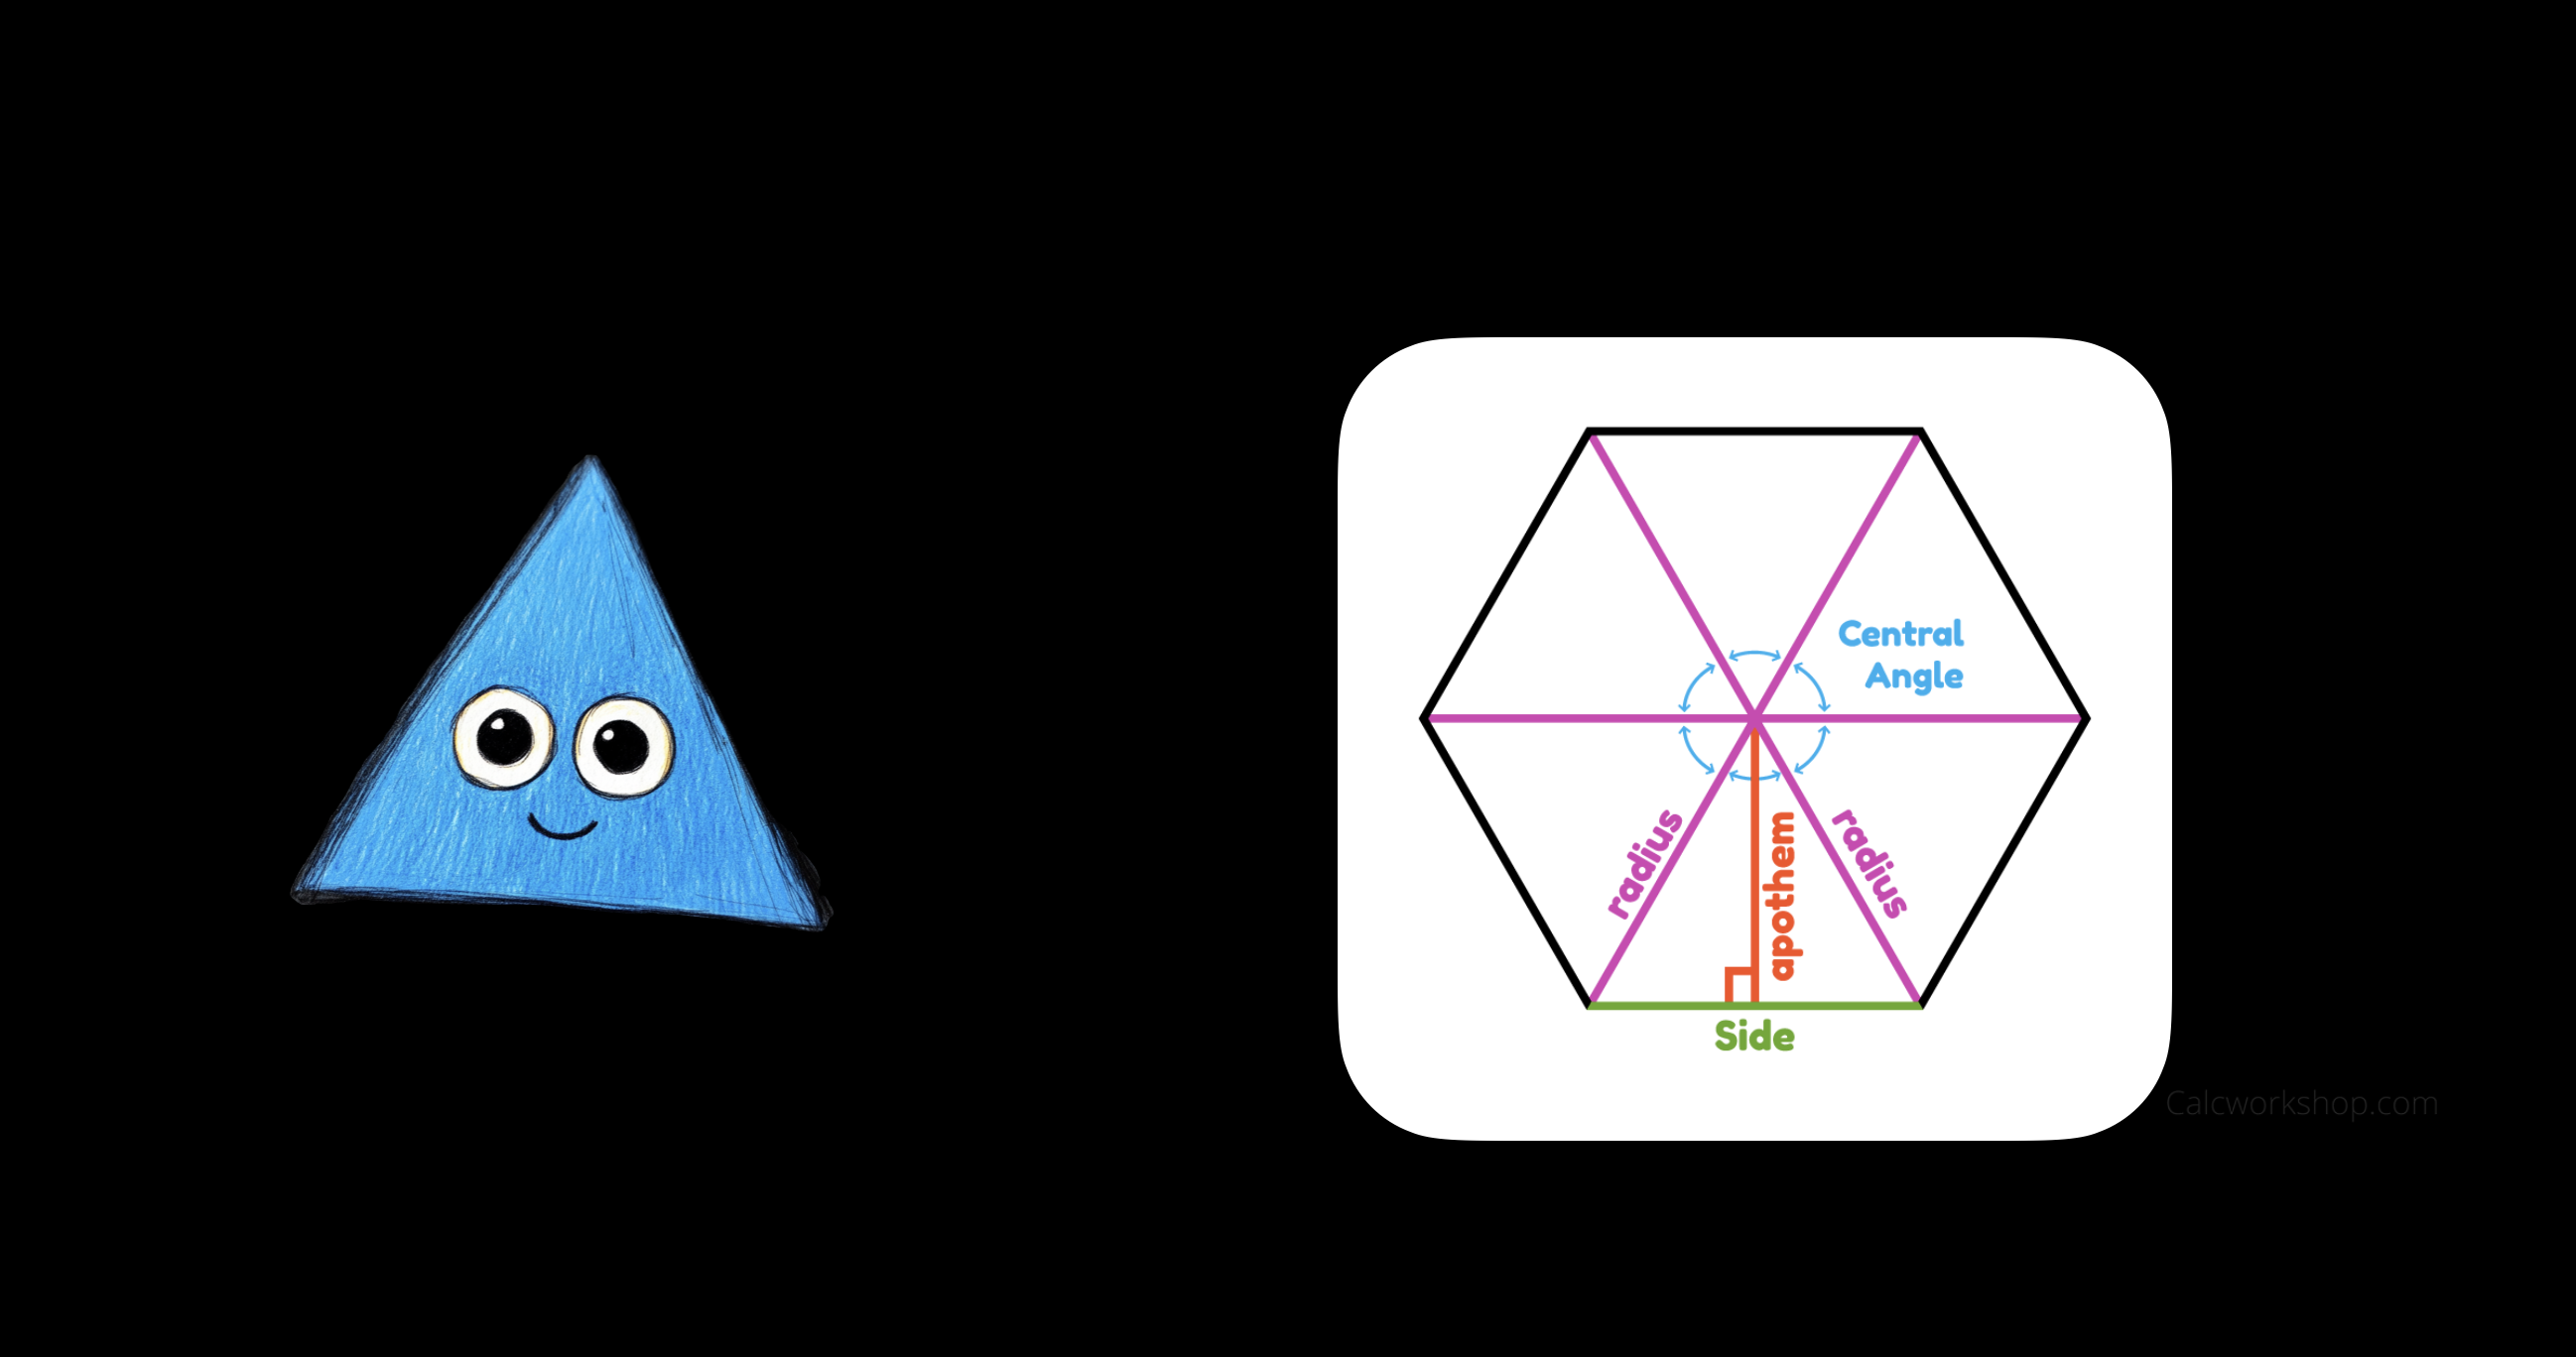
깐깐한 세모에겐 후임이 한동안 없었는데, ‘네모’라는 후임이 들어오게 되었다.
새로 들어온 ‘네모’의 과제는 세모의 로직을 파악하고 확장하는 과제가 주어졌다.
‘네모’는 세모의 코드를 보고 놀랐다.
class 정다각형 {
  constructor(private 변의개수: number, private 변의길이: number) {
    if (변의개수 < 3) {
      throw new Error("도형나라 국민은 최소 3개의 변이 필요합니다.");
    }
  }

  면적계산(): number {
    const 중심각 = this.중심각_구하기();
    const 삼각형높이 = this.삼각형높이_계산(중심각);
    const 삼각형면적 = this.삼각형면적_계산(삼각형높이);
    const 다각형면적 = this.다각형면적_계산(삼각형면적);
    return 다각형면적;
  }

  private 중심각_구하기(): number {
    return (2 * Math.PI) / this.변의개수;
  }

  private 삼각형높이_계산(중심각: number): number {
    const 반변의길이 = this.변의길이 / 2;
    return 반변의길이 / Math.tan(중심각 / 2);
  }

  private 삼각형면적_계산(높이: number): number {
    return (this.변의길이 * 높이) / 2;
  }

  private 다각형면적_계산(삼각형면적: number): number {
    return this.변의개수 * 삼각형면적;
  }
}

// 사용 예:
const 오각형 = new 정다각형(5, 10);
console.log("Area:", 오각형.면적계산());
뭔가 여러 과정을 통해 면적을 계산하는 로직인 것 같은데, ‘네모’는 한번에 이해하기 어려웠다.
그래서 네모는 과정을 알기위해 console.log를 찍어보기로 했다.
class 정다각형 {
  constructor(private 변의개수: number, private 변의길이: number) {
    if (변의개수 < 3) {
      throw new Error("도형나라 국민은 최소 3개의 변이 필요합니다.");
    }
  }

  면적계산(): number {
    const 중심각 = this.중심각_구하기();
    console.log("중심각:", 중심각);
    const 삼각형높이 = this.삼각형높이_계산(centralAngle);
    console.log("삼각형높이:", 삼각형높이);
    // ...
  }
}
그 순간 뒷통수에서 세모의 시선이 느껴졌다. 깐깐한 세모는 자신의 코드를 건드리는 것을 허락하지 않았다.
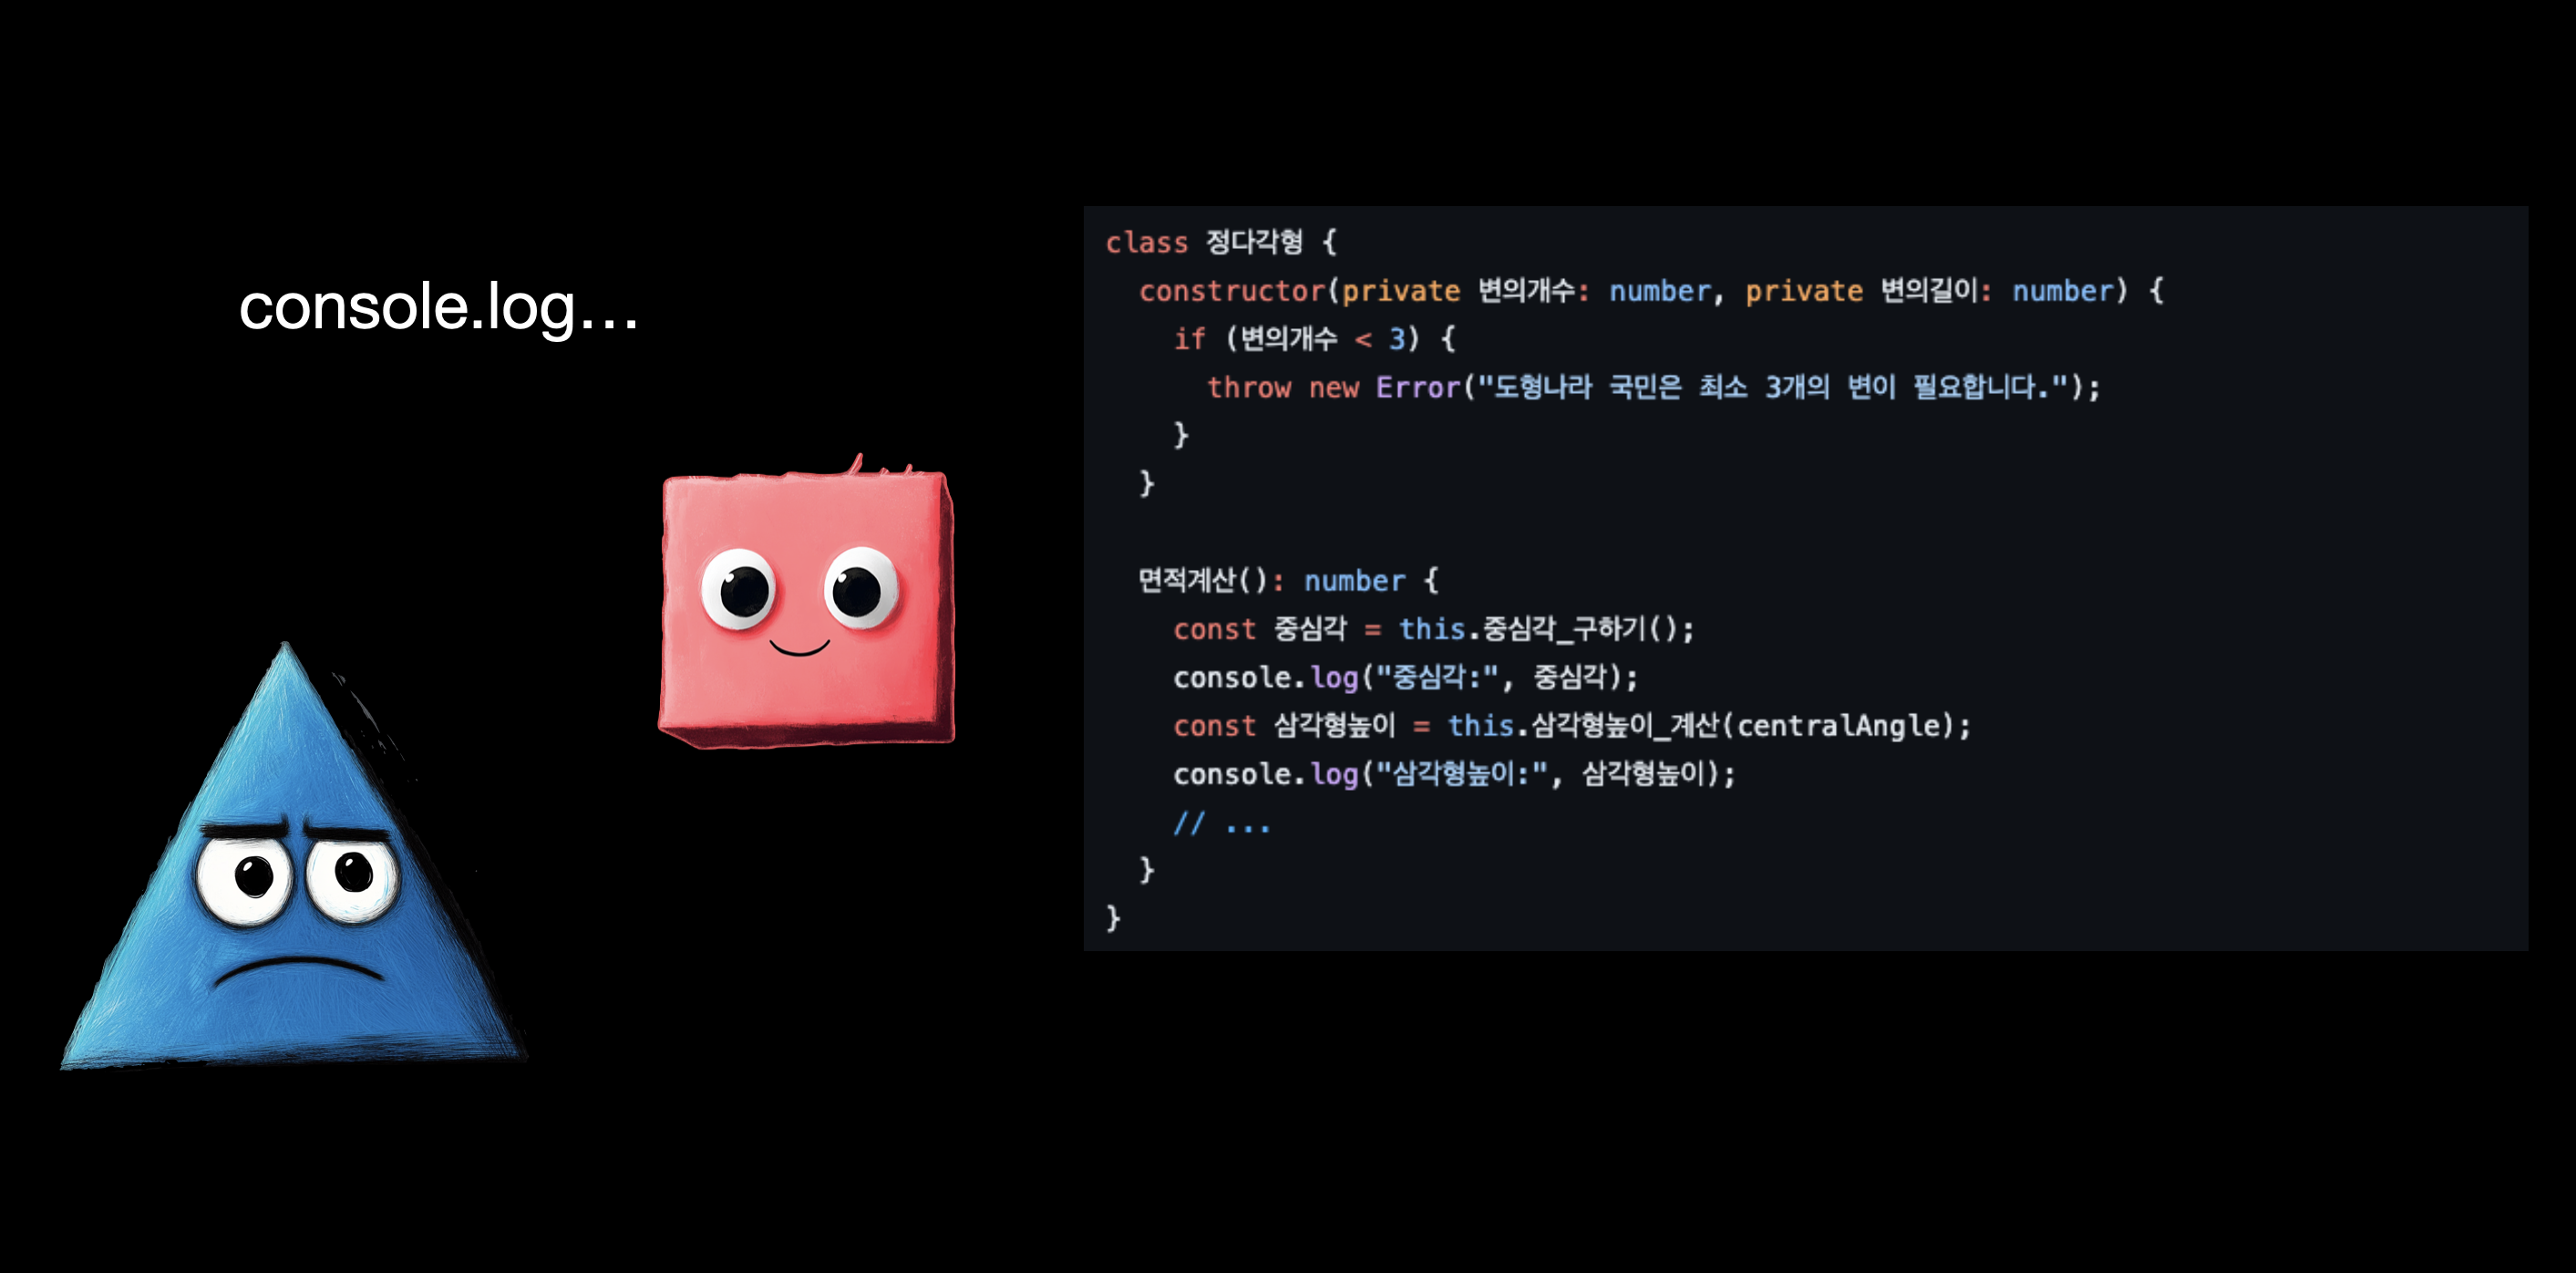
‘네모’는 어떻게든 세모의 코드를 건드리지 않고, 과정을 알아내기로 했다.
아이디어를 떠올려보기로 했다. 우선 이전에 읽은 글이 떠올랐다.
Proxy와 Reflect 어디다 쓰나? | 장용석 블로그
Proxy와 Reflect는 ES6에서 추가된 기능이다. Proxy는 객체의 기본 동작을 가로채는 기능을 제공하고, Reflect는 객체의 기본 동작을 대신하는 메서드를 제공한다. 예시를 통해 알아보자.
https://yongseok.me/blog/proxy_reflect_case
Proxy와 같이 객체를 감싸는 방법을 이용하면, 로직을 중간 중간 끼워 넣을 수 있을 것 같았다.
비슷한 개념으로 Class 에서 사용할 수 있는 방법이 있을까?
한때 python 개발을 했던 기억이 떠올랐다.
파이썬에서는 @ 데코레이터를 사용하여 함수를 감싸는 방법이 있었다.
함수를 직접건드리지 않고, 함수의 호출 전후에 로직을 추가할 수 있었다.
def logger(func):
  def wrapper(*args, **kwargs):
    print(f"함수 {func.__name__}이 호출되었습니다.")
    return func(*args, **kwargs)
  return wrapper

@logger
def func():
  print("hello world")

# 사용 예:
func()
# 출력: 함수 func이 호출되었습니다.
# 출력: hello world
그렇다면 JavaScript에서도 데코레이터가 있다면, 세모의 코드를 건드리지 않고 로직을 추가할 수 있을 것이다.
그래서 네모는 데코레이터를 찾아보기로 했다.
Decorator
GitHub - tc39/proposal-decorators: Decorators for ES6 classes
Decorators for ES6 classes. Contribute to tc39/proposal-decorators development by creating an account on GitHub.
https://github.com/tc39/proposal-decoratorsdecorator는 아직 ECMAScript 표준에는 포함되지 않았지만, stage 3까지 진행되었다. 이미 TypeScript(5.0이상)에서는 decorator를 사용할 수 있으니, TypeScript를 사용해보기로 했다.
TypeScript: Documentation - Decorators
TypeScript Decorators overview
https://www.typescriptlang.org/ko/docs/handbook/decorators.html데코레이터를 사용하여 세모의 코드를 건드리지 않고 로직 추가하기
네모는 문서를 더 깊이 들여다보기전에, 먼저 간단하게 만들어보기로 했다.
function log(value: any, context: ClassMethodDecoratorContext) {
  const methodName = String(context.name);

  return function(this: any, ...args: any[]) {
    console.group(`[${methodName}]`);
    console.log('==> 입력:', args);
    const result = value.call(this, ...args);
    console.log("<== 출력:", result);
    console.groupEnd();
    return result;
  };
}
간단하게 log 데코레이터를 만들었다.
이 데코레이터는 메서드 데코레이터로 메서드가 호출되기 전후에 console.group을 통해 로그를 찍어준다.
이제 세모의 코드에 데코레이터를 적용해보자.
class 정다각형 {
  constructor(private 변의개수: number, private 변의길이: number) {
    if (변의개수 < 3) {
      throw new Error("도형나라 국민은 최소 3개의 변이 필요합니다.");
    }
  }

  @log // <= 데코레이터 적용
  면적계산(): number {
    const 중심각 = this.중심각_구하기();
    const 삼각형높이 = this.삼각형높이_계산(중심각);
    const 삼각형면적 = this.삼각형면적_계산(삼각형높이);
    const 다각형면적 = this.다각형면적_계산(삼각형면적);
    return 다각형면적;
  }

  @log
  중심각_구하기(): number {
    return (2 * Math.PI) / this.변의개수;
  }

  @log
  private 삼각형높이_계산(중심각: number): number {
    const 반변의길이 = this.변의길이 / 2;
    return 반변의길이 / Math.tan(중심각 / 2);
  }

  @log
  private 삼각형면적_계산(높이: number): number {
    return (this.변의길이 * 높이) / 2;
  }

  @log
  private 다각형면적_계산(삼각형면적: number): number {
    return this.변의개수 * 삼각형면적;
  }
}

// 사용 예:
const 오각형 = new 정다각형(5, 10);
console.log("Area:", 오각형.면적계산());
모든 메서드에 @log 데코레이터를 적용했다.
그러고 코드를 실행해보았다.
|[면적계산]
|==> 입력: []
  |[중심각_구하기]
  |==> 입력: []
  |<== 출력: 1.25

  |[삼각형높이_계산]
  |==> 입력: [1.25]
  |<== 출력: 6.88

  |[삼각형면적_계산]
  |==> 입력: [6.88]
  |<== 출력: 34.40

  |[다각형면적_계산]
  |==> 입력: [34.40]
  |<== 출력: 172.00
|<== 출력: 172
Area: 172.00
오! 로직을 건들이지 않고, 네모가 원하는 로그를 찍을 수 있게 되었다.
간단하게 메서드 내부에 console.log를 넣어서 해결 할 수도 있었지만, 세모의 반발이 있었다.
그래서 먼길 돌아 Decorator를 사용하여 문제를 해결하게 되었다.

세모의 반발이 없었더라도, 네모 본인도 코드에 직접 로그를 찍는 것은 뭔가 찝찝했다.
그 이유가 무엇일까? 곰곰히 생각해보았다.
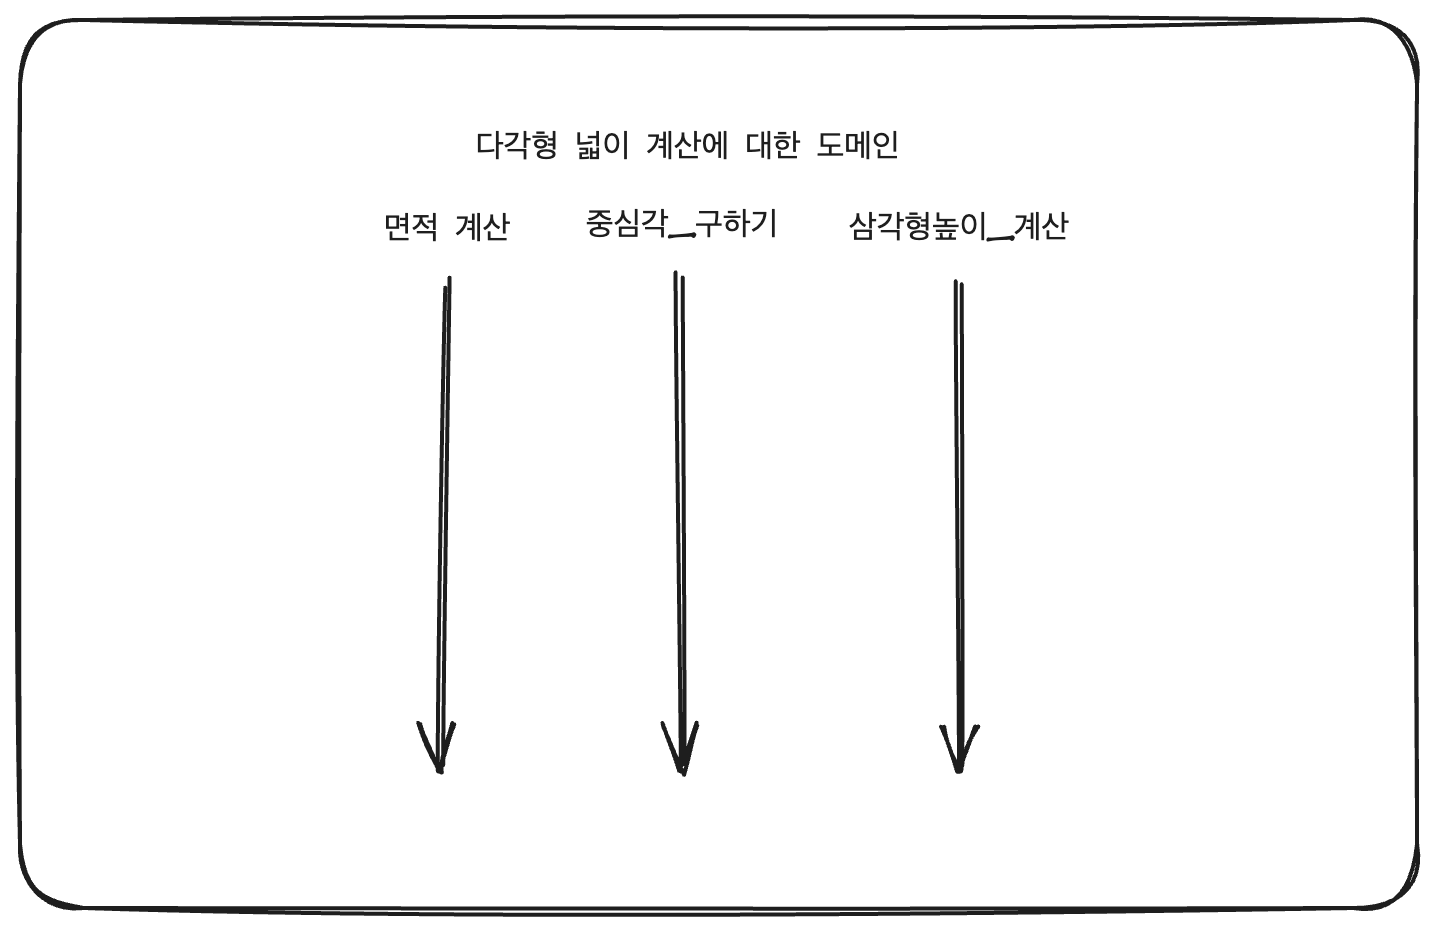
기존 로직은 위와 같이 다각형의 넓이 계산에 대한 도메인을 가지고 있다.
내부 메서드들은 각각의 역할을 가지고 있고, 이를 통해 다각형의 넓이를 계산한다.
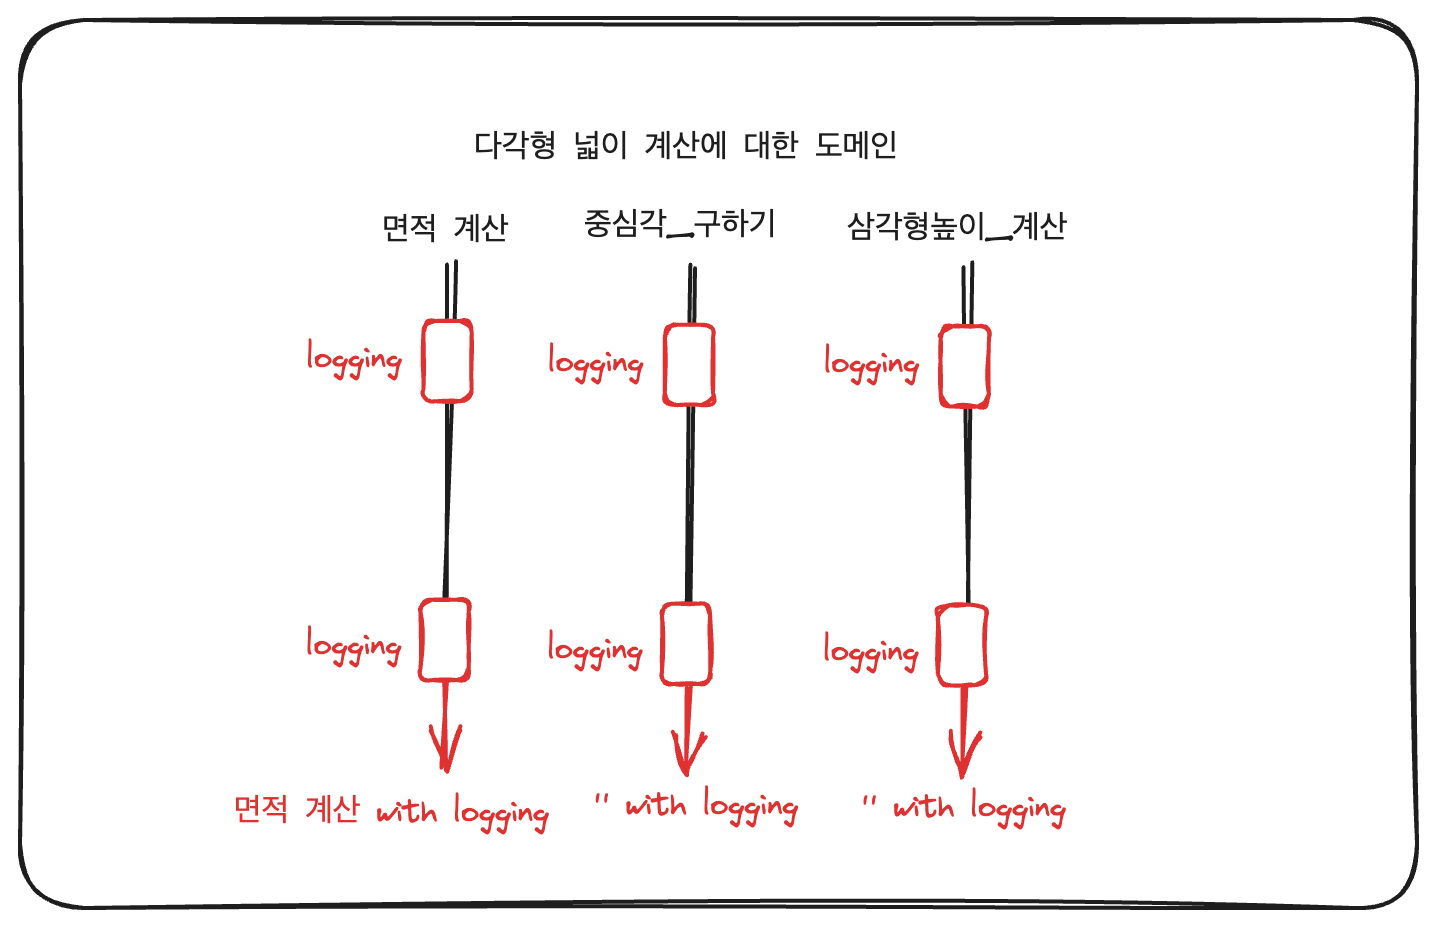
하지만, 메서드 내부에 로그를 추가하게 되면 기존의 도메인 로직과 로그가 섞이게 된다.
서로 다른 목적의 로직이 합쳐지게 되니, 단순히 면적계산이 아니라 면적계산withLogging 이라는 새로운 메서드가 되어버린다.
이렇게 이질감이 드는 이유는, 로깅 로직은 다각형 넓이 계산과 별개의 역할을 하는 횡단 관심사(Cross-cutting Concern)이기 때문이다.
세로로 뻗어있는 도메인 로직과 상관 없이, 적용되어야 하는 로직이다.
이 경우는 그 대상이 Class이었고, 구현을 위해 Decorator를 사용하였다.
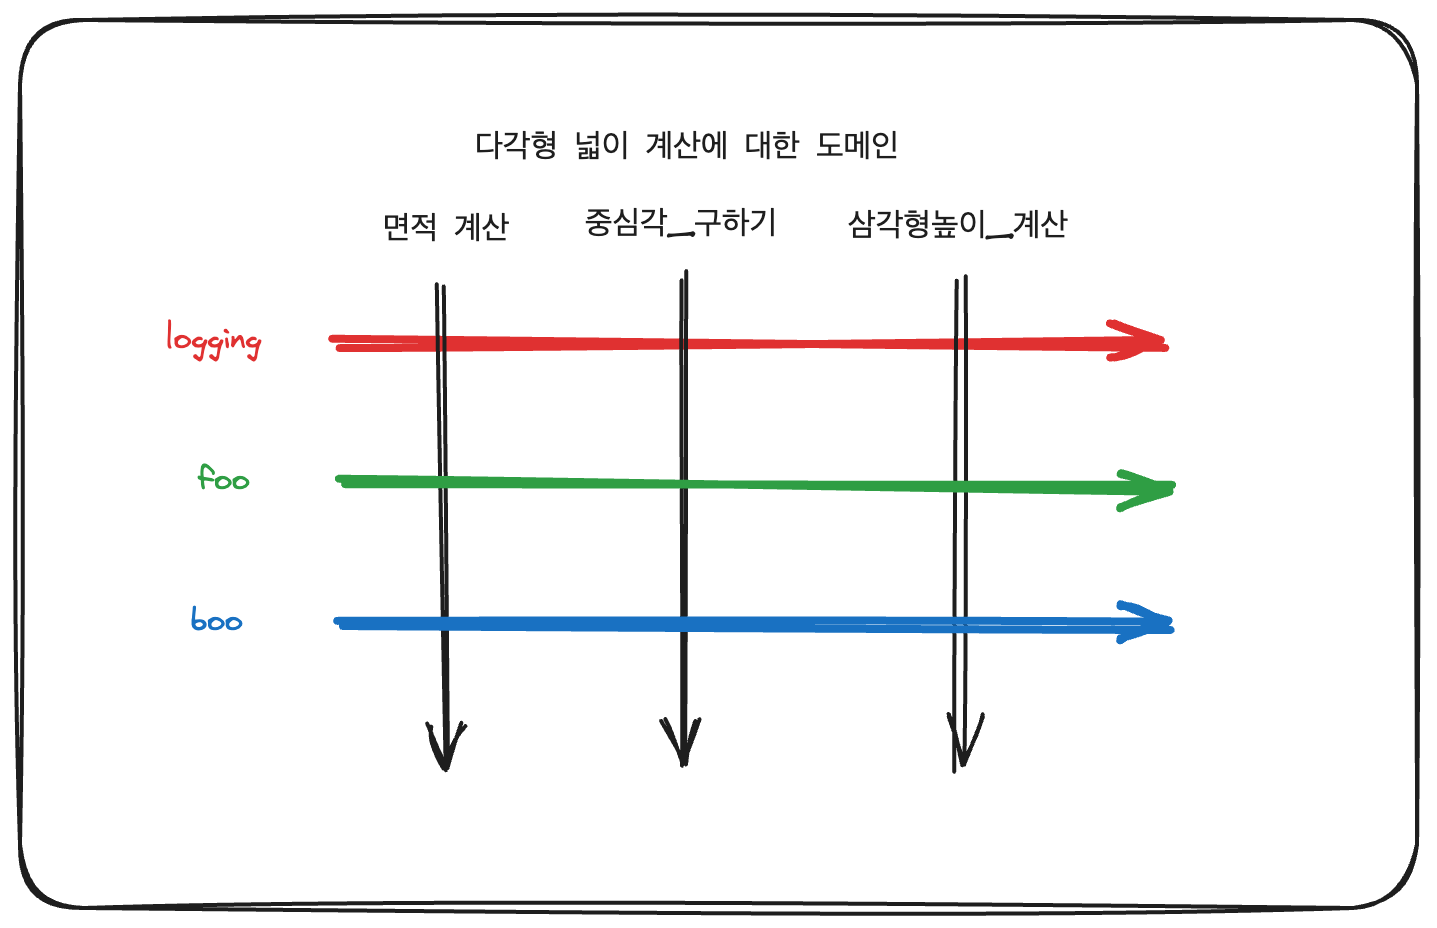
로깅은 세로 선을 건들이지 않고 가로로 끼워넣어졌다. 그 외의 로직들도 마찬가지로 가로로 끼워넣을 수 있다.
이 과정이 일종의 직조(weaving)라고 할 수 있을 것 같다.

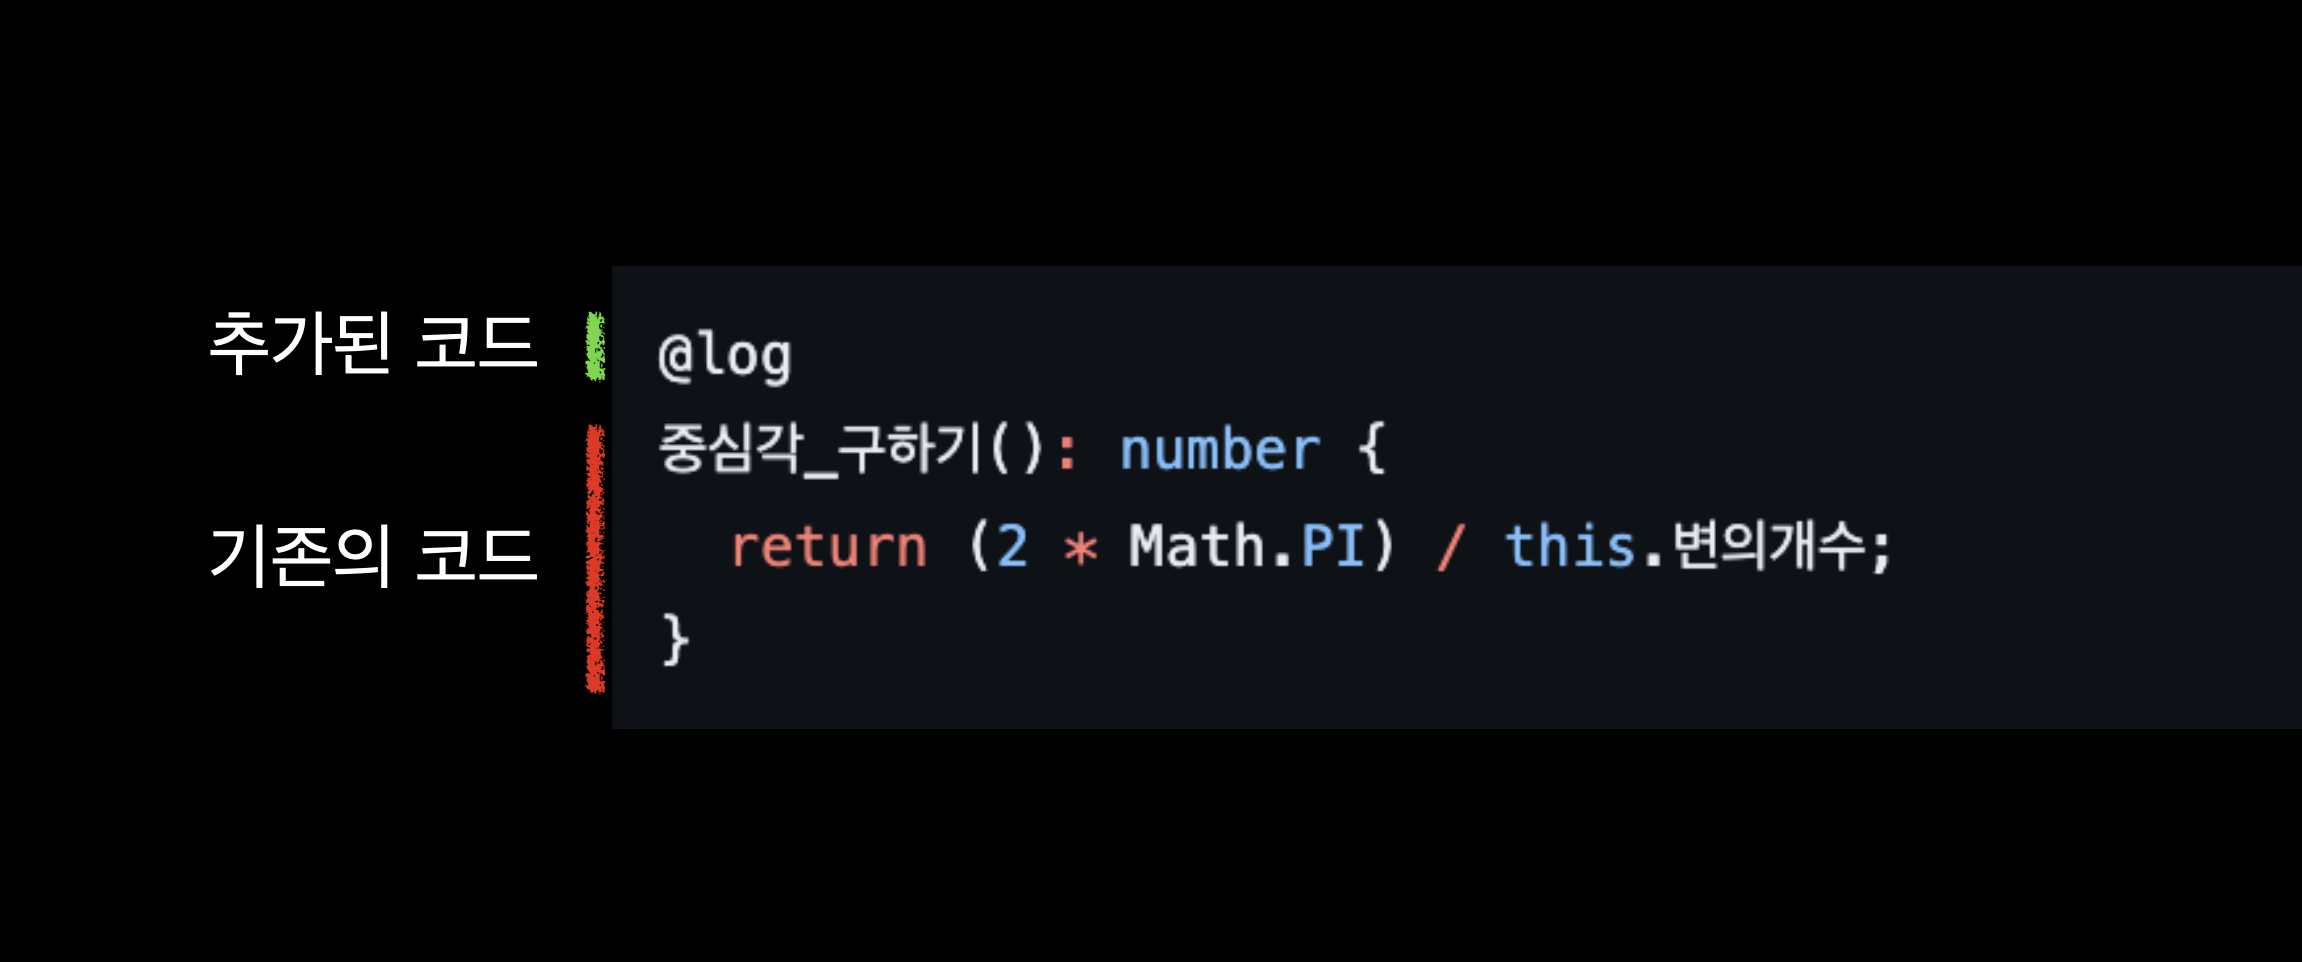
조형적으로도 기존의 로직을 침범하지 않아, 인지적인 부담도 적다.
이런 방법론은 AOP(Aspect Oriented Programming, 관점 지향 프로그래밍)의 구현 방법 중 하나이다.
관점 지향 프로그래밍
Aspect-Oriented Programming
Gregor Kiczales, John Lamping, Anurag Mendhekar, Chris Maeda, Cristina Videira Lopes, Jean-Marc Loingtier, John Irwin
https://www.cs.ubc.ca/~gregor/papers/kiczales-ECOOP1997-AOP.pdfAOP에 대해 검색해보면 대부분 Spring과 같은 예제가 많이 나올 것이다.
그래서 관점 지향 프로그래밍은 OOP에 한정된 것처럼 보이지만, 논문에서도 명시되어있듯이 독립적인 개념으로 볼 수 있다.
여기서 관점(Aspect)의 핵심은 ‘무엇’ 을 할지와 ‘어디에’ 적용할지를 분리하는 것이다.
일종의 관심사 분리를 통해, 결합도를 낮추고, 재사용성을 높이는 것이다.
비슷한 목적을 가진 Dependency Injection이 떠오를 수도 있다.
DI는 주로 객체 간의 관계와 생성에 초점을 맞추는 반면, AOP는 객체의 행위에 초점을 맞춘다.
객체 간의 관계의 결합도 보단 행위라는 액션에서 부가적인 것을 분리하여 결합도를 낮추는 것이다.
햇갈릴 요소는 없지만, 같이 떠오를 수 있는 개념이니 참고하면 좋을 것 같다.
데코레이터란?
‘Decorate’ 라는 단어는 ‘장식하다’ 라는 뜻을 가지고 있다.
‘장식’ 한다라는 의미는 기존의 것을 꾸민다 라는 의미를 가지고 있다.
그런 의미에서 프로그래밍에서 ‘decorate’한다라는 의미또한 기존의 것을 꾸미는 것을 의미한다.
기존의 코드를 수정하지 않고, 기능을 추가하거나 변경하는 것이라고 보면 된다.
데코레이터 패턴
아마 유래는 디자인 패턴에서 온 것이 아닐까 싶다.
디자인패턴 책으로 유명한 1994년에 발간된 **‘Design Patterns: Elements of Reusable Object-Oriented Software’**에서 Structural Patterns의 일부로 Decorator Pattern이 소개되었다.
Structural Patterns, 구조 패턴은 클래스와 객체가 어떻게 구성되어 더 큰 구조를 형성하는지에대해 관심을 둔 패턴이다.
그 중 데코레이터 패턴은 객체에 동적으로 책임을 추가하는 패턴이라고 소개하고 있다.
책임을 추가하는 방법으로는 상속을 떠올릴 수도 있다.
예시를 들어보자.
우리가 스타벅스에서 커피를 주문했다고 가정해보자.
평소에는 보통 커피를 주문해서 먹었지만, 오늘은 특별히 시럽을 추가해서 먹고 싶다.
class 아메리카노:
  def 설명(self):
    return "아메리카노"

내커피 = 아메리카노()
내커피.설명() # 아메리카노아메리카노클래스를 상속 받은 시럽이_한번_들어간_아메리카노 클래스를 만들어서 시럽이 들어간 아메리카노를 주문 할 수 있을 것이다.
class 시럽이_한번_들어간_아메리카노(아메리카노):
  def 설명(self):
    return "시럽이 한번 들어간 아메리카노"


내커피 = 시럽이_한번_들어간_아메리카노()
내커피.설명() # 시럽이 한번 들어간 아메리카노
하지만, 우리가 메뉴판에 시럽이_한번_들어간_아메리카노를 추가할 수는 없다.
우리는 단지 우리가 받은 아메리카노 인스턴스에 시럽을 추가하고 싶을 뿐이다.
상속은 정적이다. 컴파일 시점에 결정되고, 런타임에 변경할 수 없다.
이럴 때 데코레이터 패턴을 사용할 수 있다.
class 아메리카노:
  def 설명(self):
    return "아메리카노"

class 커피_데코레이터:
  def __init__(self, 커피):
    self.커피 = 커피

  def 설명(self):
    return self.커피.설명()

class 시럽_추가_데코레이터(커피_데코레이터):
  def 설명(self):
    return self.커피.설명() + "에 시럽 추가"

class 휘핑크림_추가_데코레이터(커피_데코레이터):
  def 설명(self):
    return self.커피.설명() + "에 휘핑크림 추가"

내커피 = 아메리카노()
내커피 = 시럽_추가_데코레이터(내커피) # 동적으로 시럽을 추가

print(내커피.설명()) # 아메리카노에 시럽 추가

친구_커피 = 휘핑크림_추가_데코레이터(시럽_추가_데코레이터(아메리카노()))
원래의 커피와 동일한 인터페이스를 가지면서, 동적으로 책임을 추가할 수 있다.
말이 조금 어렵긴 한데 추가적으로 **“데코레이터는 객체를 재귀적으로 구성하여 개방형 추가 책임을 허용하는 구조적 패턴” **라고 책에서 설명하고 있다.
일종의 Wrapper라고도 볼 수 있을 것 같다.
데코레이터와 데코레이터 패턴
데코레이터와 데코레이터 패턴 언어레벨의 문법과, 디자인 패턴이라 직접적으로 대등한 개념이라고 보기는 어렵다.
What is the difference between Python decorators and the decorator pattern? - Stack Overflow
No description available
https://stackoverflow.com/questions/8328824/what-is-the-difference-between-python-decorators-and-the-decorator-pattern책에서 설명된 데코레이터 패턴이 극복하려는 문제를 생각해보면 주로 정적 타입 언어에서 발생하는 문제점을 동적인 시점에서 해결할 수 있게 해주는 패턴이라고 볼 수 있다.
다른 언어에서의 데코레이터와 같은 요소들을 살펴보자.
Python
먼저 파이썬의 데코레이터에 대해서 알아보자.
데코레이터에 대한 언급 중에서 PEP 318에 적힌 내용을 제일 좋아한다. 같이 조금 읽어보자.
PEP 318 – Decorators for Functions and Methods | peps.python.org
The current method for transforming functions and methods (for instance, declaring them as a class or static method) is awkward and can lead to code that is difficult to understand. Ideally, these transformations should be made at the same point in the...
https://peps.python.org/pep-0318/
이는 언어 레벨에서의 새로운 문법에 대한 제안이지만, 코드를 작성하는 구현레벨에서도 도움이 될만한 개념적인 내용을 담고 있는점이 마음에 들었다.
여기서 ‘문법’ 이라는 키워드만 ‘코드’ 혹은 ‘구현’으로 바꿔서 읽어보아도 좋을 것이다.
좋은 설계 는 영역을 떠나 관통하는 개념이라고 생각한다.
딴길로 샜지만, PEP에 언급되어있는 내용을 참고해보면, 데코레이터는 함수와 메서드를 변형하는 도구이고, 이를 선언과 가까운 곳에 배치하여 코드의 가독성을 높이는 것이 목적이다.
코드를 읽는 사람으로 하여금, 좀 더 선언적으로 코드를 표현하도록 하여 응집도를 높이고, 결합도를 낮추는 것이다.
그렇다면 우리의 javascript 데코레이터는 어떤 목적을 가지고 있을까?
JavaScript
GitHub - tc39/proposal-decorators: Decorators for ES6 classes
Decorators for ES6 classes. Contribute to tc39/proposal-decorators development by creating an account on GitHub.
https://github.com/tc39/proposal-decorators?tab=readme-ov-fileTC39 Proposal에서 보는 것 처럼 JavaScript에서 기존에 함수에 대해서 데코레이터 패턴을 적용하는 것은 간단하게 래핑하여 사용할 수 있었다.
문서 속 예시와 같이 이렇게 쓸 수 있었다.
const foo = bar(baz(qux(() => /* 멋진 일을 하세요 */)))하지만, 클래스나 객체에 대해서는 이를 적용하기 어려웠다. 이를 해결하기 위해 Decorator 문법을 제안되었다.
그렇다면 Decorator는 JavaScript에서 본질적으로는 어떤 의미일까?
먼저 간단한 메서드 데코레이터를 가지고 살펴보자.
function logged(value, { kind, name }) {
  if (kind === "method") {
    return function (...args) {
      console.log(`starting ${name} with arguments ${args.join(", ")}`);
      const ret = value.call(this, ...args);
      console.log(`ending ${name}`);
      return ret;
    };
  }
}

class C {
  @logged
  m(arg) {}
}

new C().m(1);
// starting m with arguments 1
// ending m
우선 대상인 Class 부터 분해해보자. JavaScript(ES6) 에서 메서드는 아래와 같이도 표현해 볼 수 있을 것이다.
function C() {}

C.prototype.m = function(arg) {};

new C().m(1);
그렇다면 우리가 위에서 살펴봤던 함수에서 데코레이터 패턴을 구현했던 것처럼 메서드에도 데코레이터 패턴을 적용할 수 있을 것이다.
데코레이터를 desugar하면 대략 아래와 같이 표현할 수 있을 것이다.
class C {
  m(arg) {}
}

C.prototype.m = logged(C.prototype.m, {
  kind: "method",
  name: "m",
  static: false,
  private: false,
}) ?? C.prototype.m;
현주소
The TC39 Process
No description available
https://tc39.es/process-document/현재 JavaScript 데코레이터는 Stage 3 단계에 들어가 있다. 3단계에서는 거의 최종 스펙에 가까운 단계라고 볼 수 있다.
하지만 아직 정식 문법으로 들어가지 않았기 때문에, Babel이나 Typescript의 트랜스파일러에 의존하여 사용해야 한다.
Babel 같은 경우는 아래와 같은 플러그인을 제공한다. https://babeljs.io/docs/babel-plugin-proposal-decorators
TypeScript의 경우는 어떠할까?
TypeScript는 꽤나 오래전 부터 데코레이터를 지원하고 있었다. 익숙하진 않지만 들어봤을 법한 옵션으로 tsconfig에서
"experimentalDecorators": true 옵션을 통해 데코레이터를 사용할 수 있었다.
differences-with-experimental-legacy-decorators
No description available
https://devblogs.microsoft.com/typescript/announcing-typescript-5-0/#differences-with-experimental-legacy-decorators
이 옵션의 경우는 Stage 2 단계의 데코레이터를 사용할 수 있게 해주는 옵션이다.
TypeScript 5.0 부터는 Stage 3 단계의 데코레이터를 사용할 수 있게 되었기 때문에, experimentalDecorators 옵션은 레거시용으로 남게되었다.
Announcing TypeScript 5.0 - TypeScript
No description available
https://devblogs.microsoft.com/typescript/announcing-typescript-5-0/#decorators
정식 문법으로 들어가게 된다면, 타겟이 최신일 때는 엔진에서 바로 실행되는 것이 가능해질 것이다.
V8 쪽에서도 아래와 같은 작업들이 진행 중인 걸로 보인다.
Implement the decorators proposal
The decorators proposal (https://github.com/tc39/proposal-decorators) reached Stage 3 at the March 2022 TC39.
https://issues.chromium.org/issues/42202709https://chromium-review.googlesource.com/q/hashtag:%22decorators%22
Gerrit Code Review
https://chromium-review.googlesource.com/q/hashtag:%22decorators%22메타데이터
데코레이터는 자신이 데코레이트 하는 대상에 대해서는 최선을 다해 책임을 다한다.
그러나 데코레이터를 더욱 잘 활용하기 위해서는 대상이 되는 클래스나 메서드에 대한 추가 정보를 필요로 할 때가 있다.
예를 들어, 데코레이터를 통해 클래스를 장식하면서도 다른 데코레이터의 존재 여부를 확인하거나,
클래스 전체에 대한 정보를 활용하고자 할 때 메타데이터가 유용하게 쓰일 수 있다.
현재 JavaScript의 Stage 3 데코레이터에서는, 자신이 장식하는 대상에 대한 정보를 제한적으로만 접근할 수 있다.
데코레이터는 기본적으로 자신이 장식하는 메서드, 필드, 또는 클래스에 대한 정보를 포함하는 context 객체를 받는다.
이 context는 데코레이터가 장식하는 대상에 대한 정보만을 제공하며, 클래스 자체나 다른 필드에 대한 정보는 접근할 수 없다.
Stage 2 vs Stage 3 메타데이터 접근 방식
과거 Stage 2 데코레이터에서는 target을 통해 클래스 프로토타입 전체에 접근하는 것이 가능했다.
이를 통해 클래스 레벨에서 메타데이터를 저장하거나, 이를 활용하는 방식으로 데코레이터를 구성할 수 있었다.
예를 들어, 특정 클래스를 데코레이터로 장식할 때, 이 클래스 자체를 키로 하는 WeakMap을 사용해 관련 메타데이터를 저장하여 참조할 수 있었다.
const metadataMap = new WeakMap();

function myDecorator(target, key, descriptor) {
  // 클래스 프로토타입에 접근 가능
  const metadata = metadataMap.get(target) || {};
  metadata[key] = { someMetadata: 'value' };
  metadataMap.set(target, metadata);

  return descriptor;
}

class MyClass {
  @myDecorator
  myMethod() {}
}
위 예시에서 target을 사용해 클래스의 프로토타입에 접근하고, 해당 클래스에 대한 메타데이터를 metadataMap에 저장하여 재사용할 수 있었습니다.
stage 3에서는 아래와 같이 바뀌었다.
function someDecorator(originalMethod:any, context: ClassMethodDecoratorContext){
  const methodName = String(context.name);
  // ...
}
target이 사라지게되고 데코레이터가 장식하는 대상에 대한 정보만을 가지게 되었다.
이렇게 된 이유는 proposal에서 찾아볼 수 있다.
데코레이터가 클래스 자체에 대한 변경을 가하게 되면 클래스에 대한 예측이 어려워진다.
이를 피하기 위해 데코레이터는 데코레이트 하는 대상에 대한 정보만을 가지게 되었다.
그럼 데코레이터가 클래스 자체에 대한 정보를 얻어야 할 때는 어떻게 해야할까?
그냥 이해해보는 것으로는 부족하다. 예시 케이스와 함께 살펴보자.
데코레이터가 다른 정보를 알아야하는 경우가 어떨때가 있을까?
의존성 주입 (Dependency Injection)과 메타데이터
메타데이터는 의존성 주입(Dependency Injection) 패턴을 구현하는 데에도 중요한 역할을 한다.
의존성 주입은 클래스가 다른 클래스에 의존할 때, 클래스 내부에서 의존성을 생성하는 것이 아닌 외부에서 주입받는 방식이다.
javascript 영역에서 의존성 주입 을 구현하기 위해 데코레이터를 사용하는 경우를 살펴보자.
먼저 떠올려볼 수 있는 것은 NestJS 의 의존성 주입이다.
Documentation | NestJS - A progressive Node.js framework
Nest is a framework for building efficient, scalable Node.js server-side applications. It uses progressive JavaScript, is built with TypeScript and combines elements of OOP (Object Oriented Programming), FP (Functional Programming), and FRP (Functional Reactive Programming).
https://docs.nestjs.com/providers#dependency-injection
문서에도 나와있듯이, Nest는 의존성 주입을 기반으로 만들어진 프레임워크이다.
아래와 같은 사례에서 이렇게 사용된다.
간단한 예시로 NestJS를 처음 시작하면 나오는 예시 코드를 보자.
import { Injectable } from '@nestjs/common';

@Injectable()
export class AppService {
  getHello(): string {
    return 'Hello World!';
  }
}

// app.controller.ts
import { Controller, Get } from '@nestjs/common';
import { AppService } from './app.service';

@Controller()
export class AppController {
  constructor(private readonly appService: AppService) {}

  @Get()
  getHello(): string {
    return this.appService.getHello();
  }
}


// app.module.ts
import { Module } from '@nestjs/common';
import { AppController } from './app.controller';
import { AppService } from './app.service';

@Module({
  imports: [],
  controllers: [AppController],
  providers: [AppService],
})
export class AppModule {}
구조를 살펴보자.
이 코드만 보았을때는, AppController에서 AppService를 사용하는 것을 볼 수 있으나,
AppService가 어떻게 주입되어 사용되는지는 알 수 없다.
우리가 파악할 수 있는 단서로는, 주입되는 대상인 AppService가 @Injectable() 데코레이터를 사용하고 있다는 것과,
AppModule에서 providers에 AppService를 등록하고 있다는 것이다.
@Injectable(), @Contoller 데코레이터나, @Module 데코레이터가 마법을 만들어내는 것일까?
export function Injectable(options?: InjectableOptions): ClassDecorator {
  return (target: object) => {
    Reflect.defineMetadata(INJECTABLE_WATERMARK, true, target);
    Reflect.defineMetadata(SCOPE_OPTIONS_METADATA, options, target);
  };
}

export function Module(metadata: ModuleMetadata): ClassDecorator {
  const propsKeys = Object.keys(metadata);
  validateModuleKeys(propsKeys);

  return (target: Function) => {
    for (const property in metadata) {
      if (metadata.hasOwnProperty(property)) {
        Reflect.defineMetadata(property, (metadata as any)[property], target);
      }
    }
  };
}
막상 코드들을 살펴보면 몇줄 되지 않는다. 마법같은 일은 일어나지 않고, 뭔가를 세팅만 해주고 있다.
분명 nestjs를 실행하게되면 어딘가에서 AppService를 생성하고 AppController에 주입해주고 있을 것이다.
그러나 실질적인 연결고리는 우리가 겉으로 파악할 수 없었다. 단지 모듈에서 등록할때 AppService를 등록해주었을 뿐이다.
겉보기에 직접 주입해주지 않는다는 것은, ‘정보’만을 통해서 누군가가 주입해주는 것이다.
여기서 우리는 @Injectable데코레이터를 통해서 주입가능함이라는 ‘정보’ 표시해주었고 @Module데코레이터를 통해서 이 ‘정보’를 전달하였다.
이를 통해 nestjs는 내부적으로 AppService를 생성하고 AppController에 주입해주었을 것이다.
여기서 중요한 것은 ‘정보’의 매개체로 메타데이터가 사용되었다.
Reflect.defineMetadata(INJECTABLE_WATERMARK, true, target);메타데이터는 일종의 정보의 정보라고 볼 수 있다.
여기서는 Reflect metadata 가 사용되었는데, 이것은 stage 3 이전에 사용되던 방식이다.
Just a moment...
No description available
https://www.npmjs.com/package/reflect-metadata메타데이터 또한 데코레이터와 별개로 따로 proposal이 진행되고 있다.
현재 stage 3로 진행중이며, typescript 에서는 5.2 버전부터 stage3에 맞춰서 메타데이터를 지원한다.
TypeScript: Documentation - TypeScript 5.2
Decorator Metadata
https://www.typescriptlang.org/docs/handbook/release-notes/typescript-5-2.html#decorator-metadataGitHub - tc39/proposal-decorator-metadata
Contribute to tc39/proposal-decorator-metadata development by creating an account on GitHub.
https://github.com/tc39/proposal-decorator-metadataStage 3 메타데이터
Stage3 에서는 어떻게 바뀌었는지, 의존성 주입 예시를 우리가 다시 만들어보도록 하자.
먼저 Injectable 데코레이터를 만들어보자.
(Symbol as any).metadata ??= Symbol('Symbol.metadata');

const METADATA_KEY = Symbol('DI:METADATA');

function Injectable() {
  return function (_: unknown, context: ClassDecoratorContext) {
    const metadata = (context.metadata[METADATA_KEY] as any) ?? { injectable: true };
    metadata.injectable = true;
    context.metadata[METADATA_KEY] = metadata;
  };
}
Injectable 데코레이터는 해당 클래스의 메타데이터에 injectable 키를 추가하고, true로 설정한다.
주입 가능한 클래스임을 표시하는 것이다.
다음으로 Inject 데코레이터를 만들어보자.
function Inject(dependencyName: string) {
  return function (_: unknown, context: ClassFieldDecoratorContext) {
    const metadata = (context.metadata[METADATA_KEY] as any) ?? { dependencies: {} };
    metadata.dependencies = metadata.dependencies ?? {};
    metadata.dependencies[context.name] = dependencyName;
    context.metadata[METADATA_KEY] = metadata;
  };
}
Inject 데코레이터는 dependencyName을 받아 해당 클래스의 메타데이터에 dependencies 키를 추가하고, 해당 클래스의 필드 이름을 키로 하여 dependencyName을 저장한다.
이를 통해 해당 클래스가 어떤 의존성을 가지고 있는지를 표시할 수 있다.
각각의 표시자가 준비되었으니, 중앙에서 관리할 Container 클래스를 만들어보자.
class Container {
  private services: Map<string, any>;

  constructor() {
    this.services = new Map();
  }

  register(name: string, ServiceClass: any): void {
    console.log(`Registering service ${name}`);
    this.services.set(name, ServiceClass);
  }

  resolve(name: string): any {
    console.log(`Resolving service ${name}`);
    const ServiceClass = this.services.get(name);
    if (!ServiceClass) {
      throw new Error(`Service ${name} not found`);
    }

    const metadata = (ServiceClass as any)[Symbol.metadata]?.[METADATA_KEY];
    if (!metadata || !metadata.injectable) {
      throw new Error(`Service ${name} is not injectable`);
    }

    const instance = new ServiceClass();

    if (metadata.dependencies) {
      for (const [propertyKey, dependencyName] of Object.entries(metadata.dependencies)) {
        instance[propertyKey] = this.resolve(dependencyName as string);
      }
    }

    return instance;
  }
}
Container 클래스는 register 메서드를 통해 서비스를 등록하고, resolve 메서드를 통해 서비스를 가져온다.
name으로 입력 받은 서비스를 resolve하는 과정에서 메타데이터를 통해 해당 서비스의 의존성 정보를 가져와서 재귀적으로 의존성을 해결한다.
// ...
const instance = new ServiceClass(); // ServiceClass의 인스턴스 생성

if (metadata.dependencies) { // 의존성이 있다면
  for (const [propertyKey, dependencyName] of Object.entries(metadata.dependencies)) {
    instance[propertyKey] = this.resolve(dependencyName as string); // 의존성 해결
  }
}
return instance;
실제 사용하는 부분을 만들어보자.
@Injectable()
class ProductService {
  constructor() {
    console.log('ProductService created');
  }

  getName() {
    return 'Product Service';
  }
}

@Injectable()
class PriceService {
  constructor() {
    console.log('PriceService created');
  }
  getPrice() {
    return 100;
  }
}

@Injectable()
class ShopService {
  @Inject('productService')
  productService!: ProductService;

  @Inject('priceService')
  priceService!: PriceService;

  listProductsWithPrices() {
    return `${this.productService.getName()} costs ${this.priceService.getPrice()}`;
  }
}

const container = new Container();

container.register('productService', ProductService);
container.register('priceService', PriceService);
container.register('shopService', ShopService);

const shopService = container.resolve('shopService');

console.log(shopService instanceof ShopService); // true
console.log(shopService.productService instanceof ProductService); // true
console.log(shopService.priceService instanceof PriceService); // true
console.log(shopService.listProductsWithPrices()); // Product Service costs 100
세 클래스를 만들어주고, 모두 Container에 등록한 후 ShopService를 resolve하여 사용해보았다.
이 과정중에서 직접적으로 의존성을 주입해주지 않았지만, Container를 통해 의존성을 주입받아 사용할 수 있었다.
이런식으로 구조를 만들면 ShopService는 ProductService와 PriceService에 의존하고 있지만, 어떻게 생성되고 주입되는지와 같은 구체적인 구현에 의존하지 않게 된다.
결합도를 낮춘 셈이다.
우리는 이렇게 결합도를 낮추는 방법으로 중간에 제3자인 Container와 이를 주고 받을 매개체인 메타데이터를 사용하였다.
정보의 정보라는 관점에서 메타데이터가 역할을 톡톡히 해주었다.
마법같은 것은 없다.
질량-에너지 보존법칙도 우리내 코드에도 동일하게 적용 된다고 생각한다. (진지하게 물리적인 의미는 아니다. 오해말것)
우리가 결합도를 낮추기 위해 무언가를 끊어내는 행위는, 마치 강력으로 붙어있는 양성자 중성자를 끊어내는 것과 같다.
핵분열 과정에서 우라늄-235에 중성자를 충돌시켜 원자핵을 분열시킨다. 그 과정에서 질량결손으로 결합에너지가 방출되어 에너지로 변환된다.
중성자를 충돌시키는 과정은 우리가 시간과 비용을 투자하고, 여러가지 방법(위의 메타데이터와 같은)을 사용하여 결합도를 낮추는 것과 같다.
결합도를 낮추기 위해서 일정한 에너지(비용)가 요구되지만, 그 결과로 방출되어 우리에게 돌아오는 에너지는 더 클 것이다.
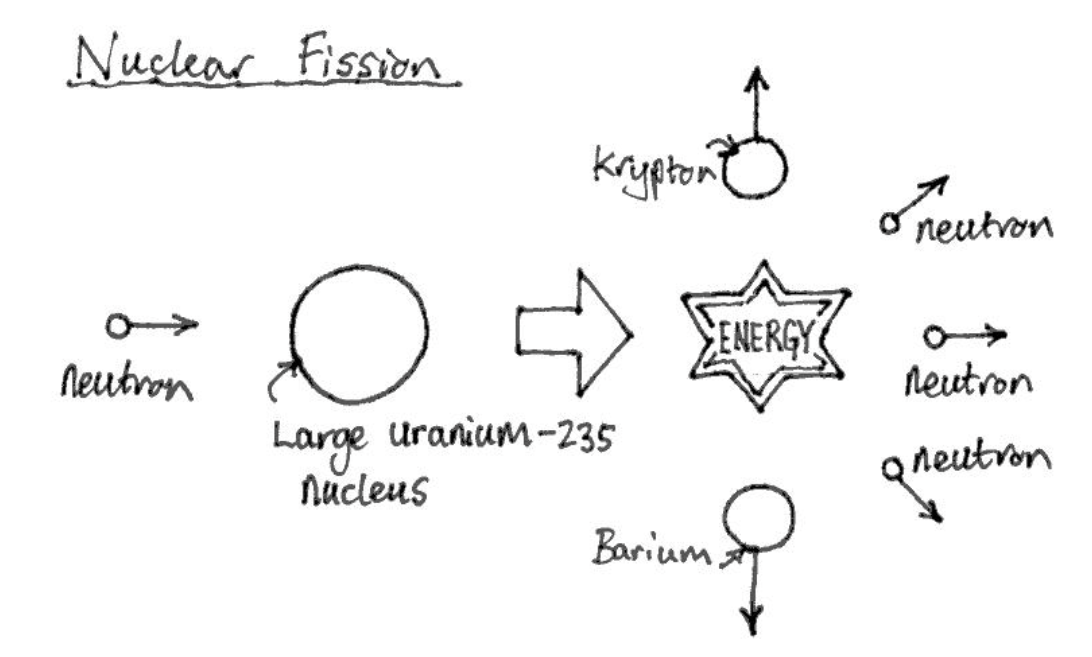
출처:https://www.automated-teaching-machines.com/Intermediate-Science/310-Nuclear-Fission-and-Fusion.php
P.S 하지만, 과유불급, 규모에 맞지 않은 너무 과도한 결합도 분리나, 목적과 행위의 주객이 전도된 결합도 분리는 역효과를 낳을 수 있다.
통제되지 않은 (핵)분열이 역사적으로 어떤 결과를 가져왔는지 생각해보자.
Reference
https://ko.javascript.info/class#ref-285 https://www.cs.ubc.ca/~gregor/papers/kiczales-ECOOP1997-AOP.pdf https://en.wikipedia.org/wiki/Aspect-oriented_programming
https://peps.python.org/pep-0318/ https://github.com/tc39/proposal-decorators?tab=readme-ov-file
https://docs.google.com/document/d/1GMp938qlmJlGkBZp6AerL-ewL1MWUDU8QzHBiNvs3MM/edit https://springframework.guru/gang-of-four-design-patterns/
https://groups.google.com/g/v8-reviews/c/inK1X-XQQPg https://chromium-review.googlesource.com/q/hashtag:%22decorators%22+(status:open%20OR%20status:merged) https://chromium-review.googlesource.com/c/v8/v8/+/5837979 https://chromium-review.googlesource.com/c/v8/v8/+/5837979/4/src/interpreter/bytecode-generator.cc#3154
https://www.typescriptlang.org/docs/handbook/release-notes/typescript-5-2.html#decorator-metadata https://www.typescriptlang.org/docs/handbook/decorators.html https://www.typescriptlang.org/tsconfig/#experimentalDecorators https://devblogs.microsoft.com/typescript/announcing-typescript-5-0/#decorators https://devblogs.microsoft.com/typescript/announcing-typescript-5-0/#differences-with-experimental-legacy-decorators
https://2ality.com/2022/10/javascript-decorators.html https://medium.com/javascript-scene/javascript-factory-functions-vs-constructor-functions-vs-classes-2f22ceddf33e